Showing posts with label method. Show all posts

Thursday, May 31, 2012

Gluten-Free Cauliflower Pizza Bento

Hello people! Remember the first gluten-free pizza crust I made over in this bento last month? It was from a mix, and it was okay. It had that gluten-free background flavor, not like real crust. Well, this time I wanted to try something totally different, and I found this cauliflower pizza crust idea floating around. I saw it at RecipeGirl's site first, but she noted that lots of others had tried similar variations. All you do is grate a head of cauliflower, mix it with egg and cheese, form a crust and bake. Sounds crazy? Actually I thought, there's no way this is going to stick together to make a crust. So I added some rice flour and some flaxmeal. Did I ruin it? Who knows? Let's just say this does not turn out to be what you think it'll turn out to be. It's basically a cheese cracker with some cauliflower bits mixed in there. Nothing wrong with that, but I mention it just so you'll know. Now, I love a cheese cracker. Salty, crispy, and yes - greasy - goodness is hard to argue with. So of course my little girl loved it! But if you try it, I'd caution you to use a nonstick pan, or parchment paper.

          ~~~~~~~~~~~~~~~~~~~~~~~~~~~~~~~~~~~~~~~~~~~~~~~~~~~~~~~~~~~~~~~~~~~

Cauliflower Pizza Crust (from Recipe Girl)

1/2 large head cauliflower (or 2+ cups shredded cauliflower)
1 large egg
1 cup finely shredded mozzarella cheese
[not in original recipe but I added 2T rice flour and 2T flaxmeal]

Directions:
1. Grate the cauliflower into small crumbles. You can use the food processor if you'd like, but you just want crumbles, not puree. I used a box grater. You'll need a total of about 2 cups or so of cauliflower crumbles (which is about half a large head of cauliflower. Place the cauliflower crumbles in a large bowl and microwave them (dry) for 8 minutes. Give the cauliflower a chance to cool. They'll be nice and soft.
2. Prepare the crust: Preheat the oven to 450 degrees F. Spray a cookie sheet or pizza pan with nonstick spray (or use a nonstick surface). In a medium bowl, mix the cauliflower crumbles (about 1 1/2 cups since they shrink after cooking) with the remaining crust ingredients. Pat the "crust" into a 9 to 12-inch round on the prepared pan. Spray the crust lightly with nonstick spray and bake for 15 minutes (or until golden). Remove the crust from the oven and turn the heat up to broil.
3. Add toppings of your choice and return pizza to oven to broil for 5 minutes or until toppings are hot and cheese is melted and bubbly.
For this pizza I used chopped mushrooms, sliced zucchini, pepperoni, and diced capsicum in varying colors, then topped with shredded mozzarella. The pizza came out nice and crisp, since I pressed the crust as thin as I could manage. It doesn't stick together very well, so a thin crackery crust probably works better than a thicker crust which might break. I packed some in her Keroppi sandwich box, and placed some refreshing fruit and veggies in the lower tier. Pretty successful as a gluten-free pizza, but my search continues...
Added to What's For Lunch.

Sunday, October 4, 2009

Making Sticky Rice

I made a batch of sticky rice today, and this time I used a mix of brown sweet rice, white sweet rice, brown short grain and white short grain rice, in a ratio of 2 cups sweet rice to 1 cup short grain rice. I also used more than the usual amount of liquid because I noticed in the past that brown rice needs more water to attain the same level of stickiness. If you have time, you should also soak the rice a few hours before cooking. I've soaked sweet rice overnight with good results. I like to take a picture of the rice before cooking because I think it looks pretty cool.
I soaked some dry shiitake mushrooms, and sliced them before putting them to cook with the rice. I used the mushroom broth to make the rice.
It's not traditional to use fresh bok choy, but I do because I like the addition of dark greens. I think it looks nice, and it's another way for the kids to get a serving of leafy greens. I chopped the leaves and stems and put them in the pot with the rice. I also added lup cheong (Chinese sausage) and green onion. You can also use char siu if you like. Everything cooks together and you have a quick and easy one-pot meal! I should have taken a picture of the finished product, but my camera battery died and I forgot to upload it later. I did make a bento with it, though, and you can see it here. Oh, sticky rice does make a good bento :)
*ETA: Here's the finished sticky rice, all ready to eat...

Thursday, September 24, 2009

Making Wontons

The good thing about wontons is that they are easy to put into soup for a healthy, tasty meal...and they also go well in bento because they taste just as good cold or room temp. There is a bit of preparation time involved, but not too much. I used ground pork, which is traditional, but you could easily substitute turkey or chicken if you prefer. Season with shoyu, salt, sugar, pepper, garlic and a little cornstarch. I mixed in chopped baby bok choy because I like the crunch and the green color it adds. You can also add chopped green onions. The filling should look something like this.
Next, place a tiny amount in the center of the wrapper. I like to use square ones, because that is how my mom taught me. I thought these were square, but it turns out they were rectangular! Oh well, it doesn't matter that much, I guess.
It's important that you don't overfill them, as it will be difficult to close, and then you run the risk of them popping open later. Dip your fingertips in water and wet two adjacent edges of the wrapper. Press those edges to the other side, folding the wrapper into a triangle. Try to press out any air pockets.
You can see here that my triangle is imperfect, due to my rectangular wrapper.  If you bought square ones, you will get a nice, perfect triangle. Good for you. Oh, and make sure you use medium thickness, not thin, as they will hold up better during cooking. Next, make a pinch in the bottom edge and bring the two side corners down to meet and overlap.
Wet the corners to seal.
Repeat with the rest of the filling, till you are done! If you calculated right, you should come out even. Today, I got lucky! Filling and wrappers came out even. Yay!
Halfway done. Look how cute they look, sitting together like that. When you are ready to cook, set a pot of water to boil. Place the wontons in gently and make sure they don't touch the bottom of the pan, or they might stick there. Cook for one more minute after they float to the surface. This is how my mom taught me; she really did not give me a more specific cooking time than that. You should watch them, because it won't take more than 5 minutes or so.
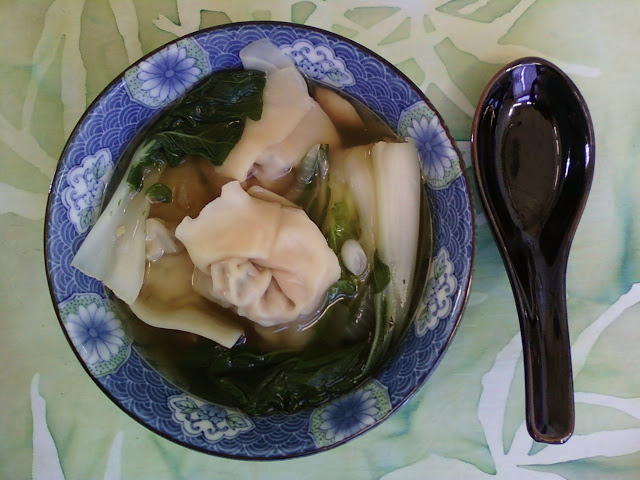
All done! Drain and cool. You can serve them in a chicken broth-based soup, with some choy, onions, mushrooms, garlic and green onion, even spinach. This is what we did for dinner tonight. It was a hit with everyone, especially the kids :) The leftover wontons made it into bento for tomorrow; see my latest on my flickr photostream.